Rules
Learn how to configure Rules Popup in Uppush to control user actions based on specific conditions. This feature allows you to display messages, enforce rules, and guide customers during their shopping journey to improve compliance and conversions
Overview
The "Rule" page, when editing popups, enables you to set specific conditions for how and when your popup is displayed.
- Discount Settings: Choose between no discount, automatic discount, or manual discount for new subscribers.
- Trigger Rules: Control the timing for when the pop-up is shown after the page loads, customizable for both desktop and mobile devices.
- Frequency Control: Set how many times a pop-up will display to non-subscribed customers, with options to limit frequency per day.
- Page Rules: Define whether the pop-up should show on all pages or specific pages of your website.
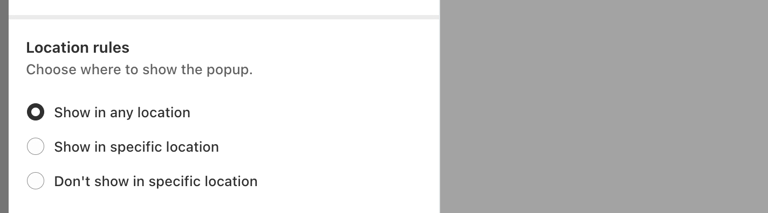
- Location Rules: Choose specific locations or show the pop-up site-wide.
How to configure ?
Follow the step-by-step instructions below to customize and configure your popup rules effectively.
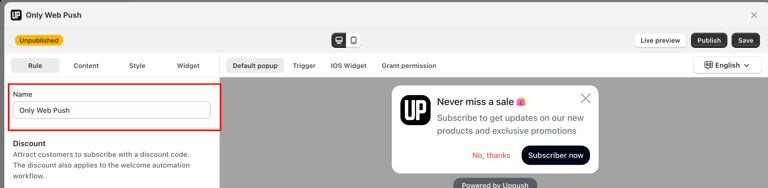
Name
To set the name of your popup, simply enter a name in the provided field. This name is solely for your reference and organizational purposes. It does not impact how the popup will function or appear on your website.
Trigger Rules
The Trigger Rules setting allows you to define exactly when and how the popup will appear to visitors on your store.
Choose one of the following trigger options:
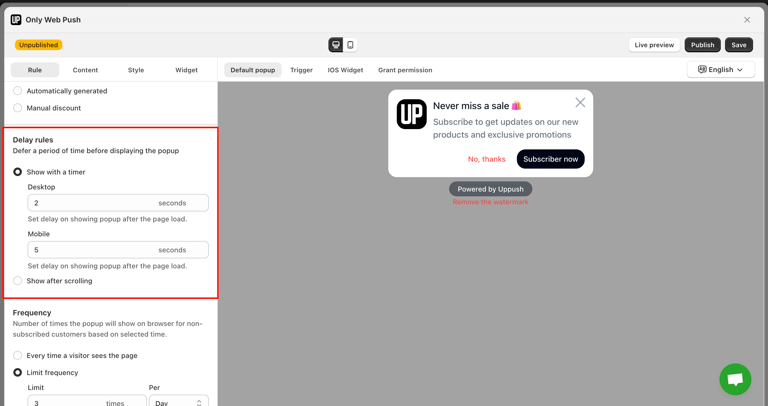
1. Show with a time
Displays the popup after a visitor stays on the page for a specific period after the page loads. You can customize the delay independently for different devices:
- Desktop: Set the delay time (in seconds).
- Mobile: Set the delay time (in seconds).
2. Show after scrolling
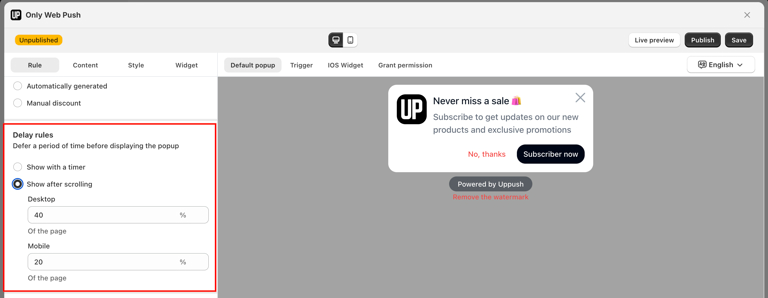
Displays the popup only after a visitor scrolls past a certain percentage of the page content, ensuring they are actively engaged before seeing the message:
- Desktop: Set the scroll depth percentage (%).
- Mobile: Set the scroll depth percentage (%).
INFO
This is useful to ensure users are engaged with your content before presenting them with the popup, enhancing the relevance of the popup and reducing disruptions in the user experience.
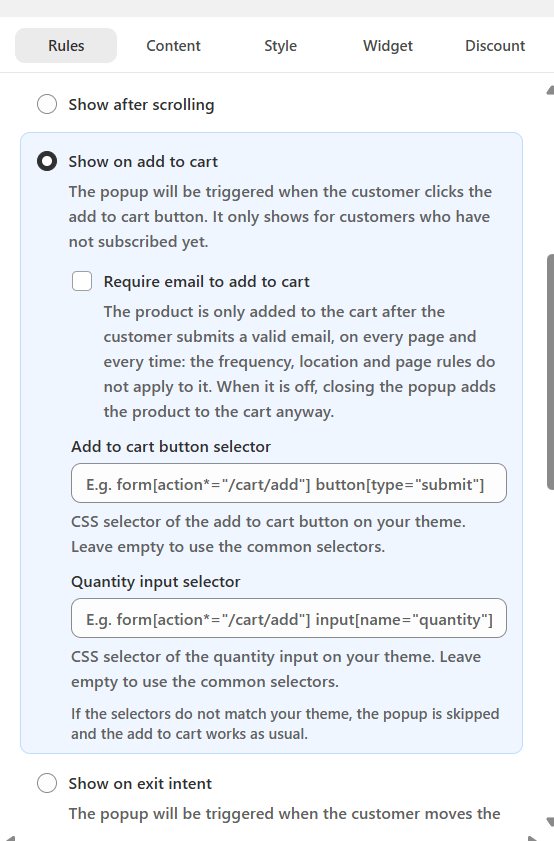
3. Show on add to cart
Triggers the popup immediately when a visitor clicks the Add to Cart button. This option only targets visitors who have not subscribed yet.
- Require email to add to cart: When enabled, the product is added to the cart only after the customer submits a valid email. This requirement applies across every page and every visit (bypassing Frequency, Location, and Page rules). If this option is disabled, closing the popup will add the product to the cart automatically.
- Add to cart button selector: Enter the custom CSS selector for the "Add to cart" button on your theme (e.g.,
form[action*="/cart/add"] button[type="submit"]). Leave blank to use default selectors. - Quantity input selector: Enter the custom CSS selector for the quantity input field (e.g.,
form[action*="/cart/add"] input[name="quantity"]). Leave blank to use default selectors.
WARNING
If the selectors do not match your store's theme, the popup will be skipped and the standard add-to-cart action will proceed normally.
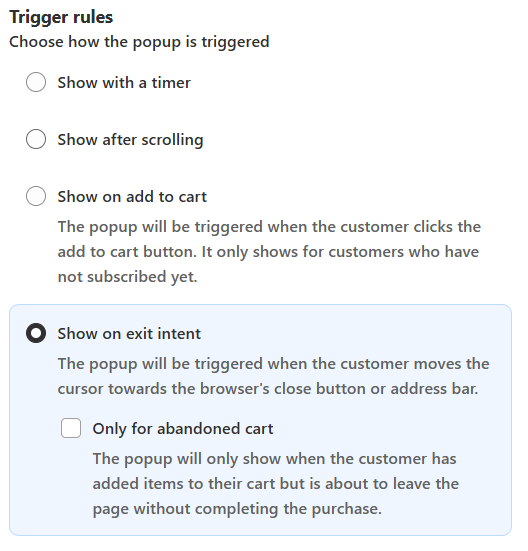
4. Show on exit intent
Triggers the popup when desktop visitors move their cursor towards the browser's close button or address bar, capturing their attention right before they leave.
- Only for abandoned cart: When checked, the popup only appears if the customer has added items to their cart but attempts to exit without completing the purchase.
Frequency
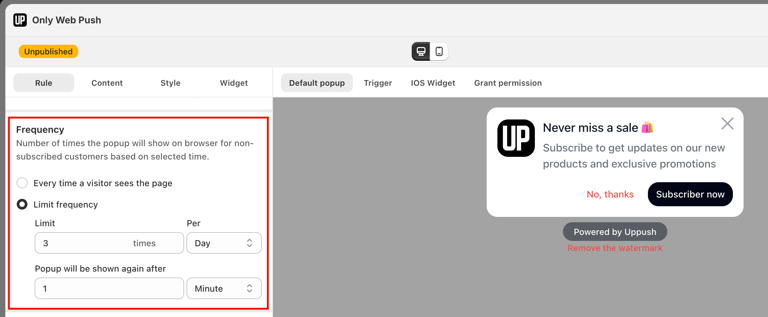
The "Frequency" setting allows you to control how often a popup is displayed to visitors.
You can choose between showing the popup every time a visitor views the page or limiting the frequency. When limiting, you can specify the number of times the popup appears within a set timeframe (e.g., 3 times per day).
You can also control the delay before the popup reappears after a specified time, such as 1 minute after the last display, to avoid overwhelming the user with constant popups.
Page rules
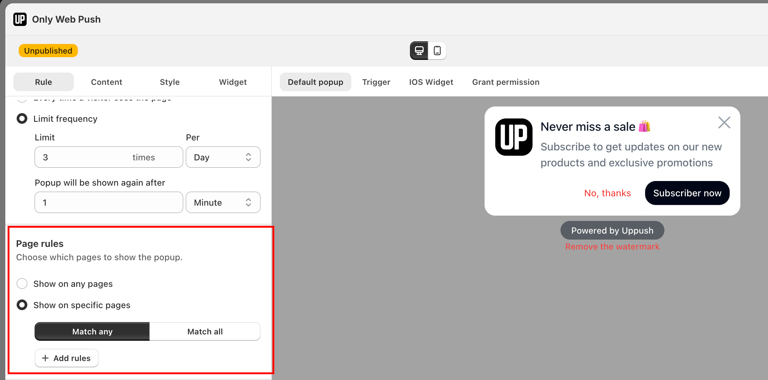
The "Page Rules" feature in Uppush allows you to control which specific pages display your pop-up. You can choose to show the pop-up on all pages or set it to appear only on particular pages.
Page rules
When setting specific pages, you can define whether the rule applies if any or all of the selected criteria match (Match any/ Match all) .
Add rules by clicking on the "Add rules" button to further customize where and how your pop-up will be shown on your website. When selecting specific pages, you can define conditions such as "Contains," "Does not contain," "Starts with," and others, using the page URL path.
For example, the rule below demonstrates that the popup will be shown on specific pages where the URL path contains "/products/ipad-m3".
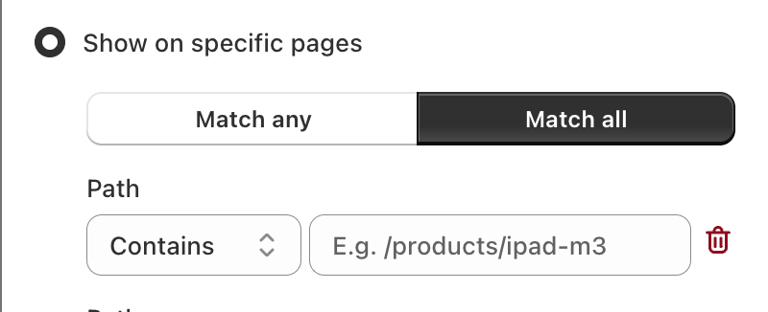
The "Contains" condition ensures the popup is triggered for any URL that includes this partial path. Additionally, the user can choose between "Match any" or "Match all" logic when applying multiple rules, meaning the popup can display if any rule matches or only when all specified rules are met. This allows for precise targeting based on different URL paths within a website.
Location Rule
Location Rules, allows you to target specific locations for displaying your popups. You have the following options:
- Show in any location: The popup will appear regardless of the user's location.
- Show in specific location: You can choose particular countries or regions where the popup should be displayed by using the country search.
- Don't show in specific location: Alternatively, you can exclude certain countries or regions where the popup will not be shown.
This provides flexibility for geographically tailored campaigns.